
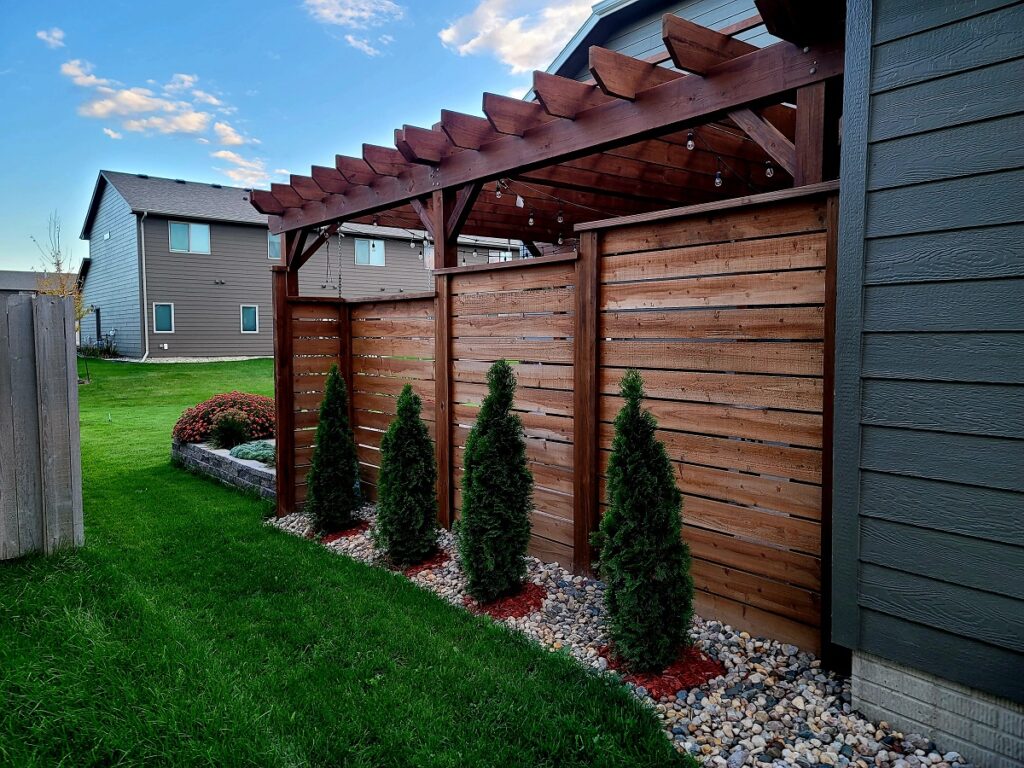
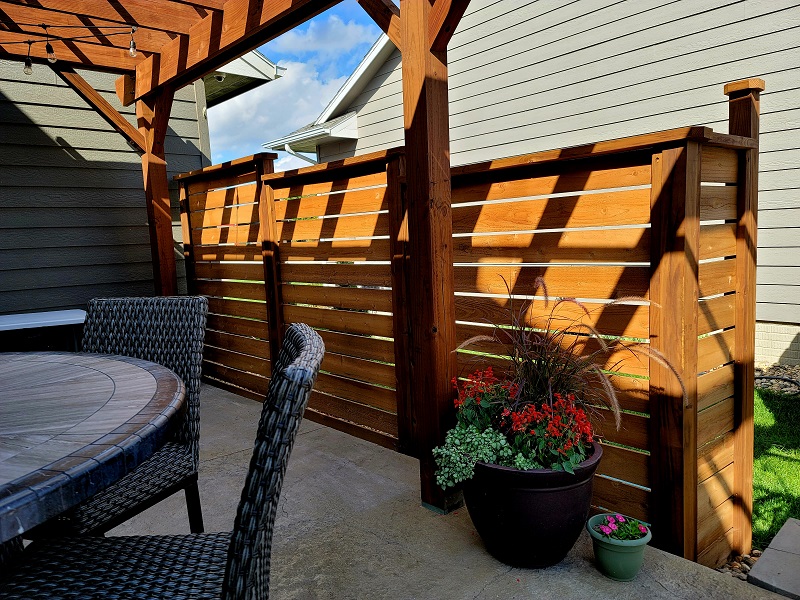
My wife and I wanted a horizontal fence that looked good on BOTH sides. We didn’t want a fence with a “good side” and a “bad side”. We wanted both sides to look the same.
One side of the fence faces our patio and it was important to look good. We spend a lot of time outside and we didn’t want to look at the “bad side” of the fence.
The other side faces the street/neighbor and I wanted this side to look good, too, providing some curb appeal!
First, some glamour shots of our double sided horizontal fence. Looks how good this thing looks!!
Follow along to see pictures and learn how to build a double sided horizontal fence.
Steps to build a double sided horizontal fence:
- Choose a design.
We opted for a design that had consistent board widths. However, feel free to be creative and experiment with different size boards. Caution when using skinny boards (i.e. 1 x 2) as they are more likely to sag and may need additional vertical bracing to prevent it. - Choose the materials.
We used cedar-tone (pre-stained) pressure-treated 4x4s for the posts and cedar fence boards for the horizontal slats/panels.
Make sure you choose a material that can withstand the outdoor elements. Pressure treated wood is treated with chemical preservatives that help prevent rot, decay, and insects. Some wood species, such as cedar and redwood, are naturally resistant to rot, decay, and insects. - Determine the horizontal span for each section of fence.
Here’s the deal: with horizontal fences, the maximum horizontal span is around 5 feet. The wider you go, the more likely your boards will sag. It also depends on the size of the board. As I mentioned earlier, skinny boards are more likely to sag than wider boards. - Dig the post holes.
Before digging, make sure you call 811 or your local utility company to mark the location of underground utilities and communication lines. The last thing you want is to dig a hole and accidentally hit an electrical or gas line. It’s free. Do it.
Post Hole Width: The rule of thumb is to dig the hole 3 times the width of the post. For example, if the post is 4 inches wide, dig a hole approximately 12 inches wide.
Post Hole Depth: A general guideline is the buried portion should be 1/2 to 1/3 the length of the above ground portion. For example, if the post is 6 ft tall above the ground, the buried portion should be at least 2 feet. However, in cold climates where the ground freezes, it’s important to dig your holes deep enough to get below the frost line so your fence doesn’t heave as the water the ground freezes and expands – pushing your fence up. You can call your local building department to inquire about your area’s specific frost depth. In my area, the recommendation is to dig the holes 42 inches deep.
If you live in an area where the ground freezes, it also helps to dig your hole in the shape of a bell (or triangle) – wider at the bottom than the top. This will help resist upward forces.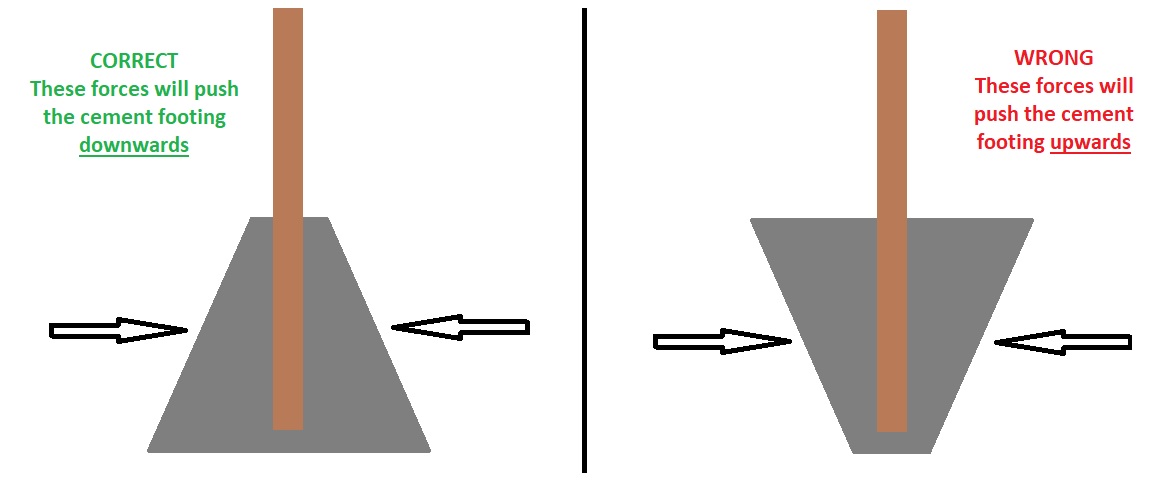
- Set the posts.
Put your post in the center of the hole, add a couple bags of fast-setting concrete, and add water. I think I used 2-3 bags of concrete per hole. I’d recommend using a fast-setting concrete mix instead of regular concrete mix because it will set up faster, you generally don’t need any bracing to keep the post in place, and many formulas don’t require manual mixing. Make sure your posts are set straight and plumb using a level. If you’re setting a lot of posts, it may be worth buying one of these cheap fence post leveling tool on Amazon.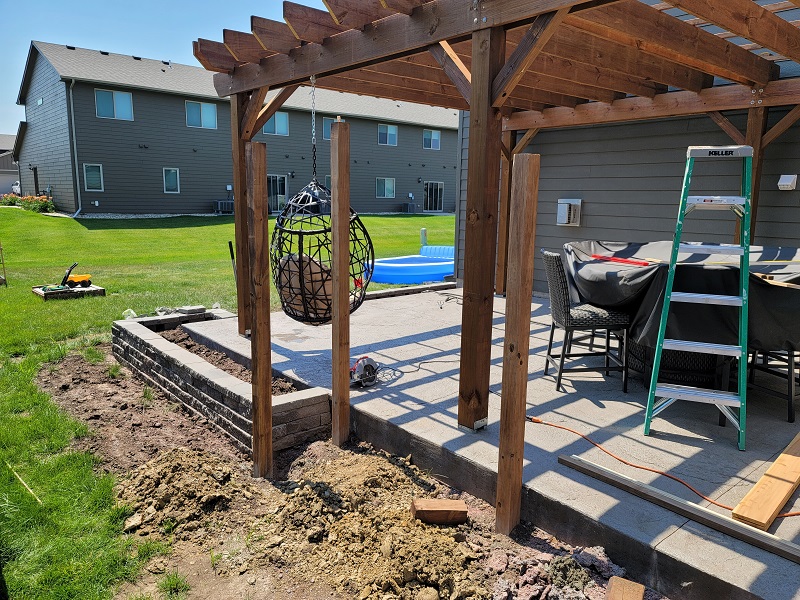
Fence Post Leveling Tool on Amazon.com: - Add the horizontal slats
Ok, so here is how to build your double sided horizontal fence so that both sides look identical. There is no such thing as a “good side” and a “bad side” – both sides look the same!
The concept is to sandwich a horizontal cedar fence picket in between vertical frame pieces. I don’t know what to call these vertical pieces – frames? stiles? anchors? braces? idk
First, I ripped a 2×4 into two pieces and attached them to the inner side of the post.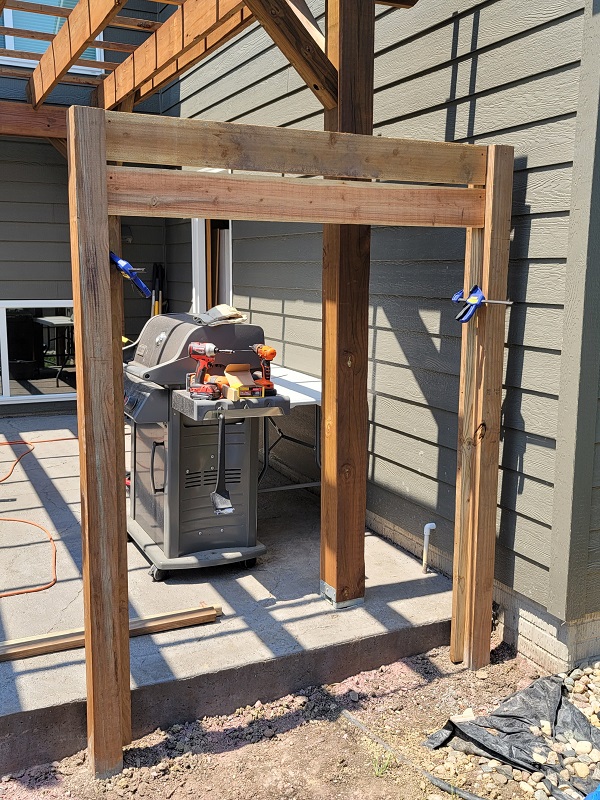
Then, I attached the horizontal slats to these vertical frame pieces. I used a couple scrap pieces of wood as spacers between each fence slat and used squeeze clamps to hold the slat in place while I screwed them in.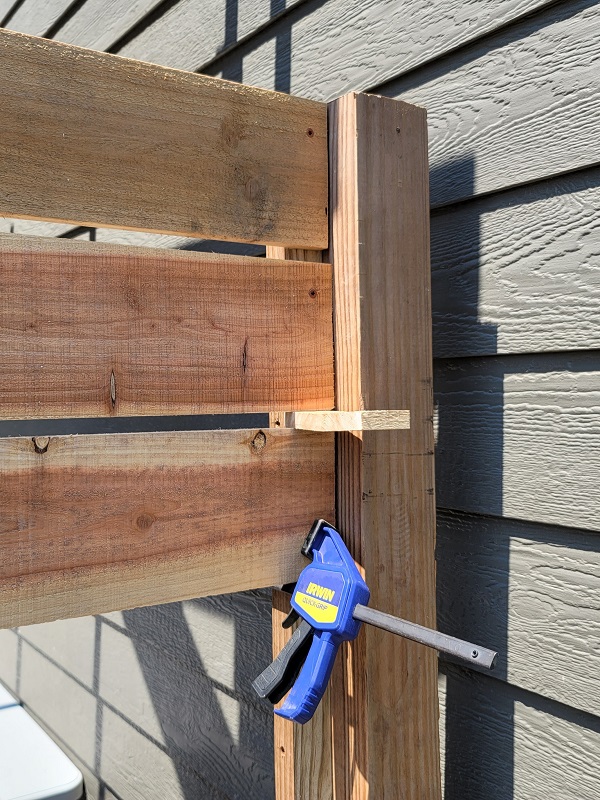
I started at the top and made my way all the way to the bottom.
After all your horizontal slats are secured, you can add the other vertical frame piece to cover up the screws.
I also added a 2×6 top cap to finish it off.
- Stain/finish
If you want to preserve the brown wood colors and protect your fence from the elements, invest in a good quality outdoor stain and sealer. You’ll need to re-apply this every 2-3 years to keep your fence protected and looking good. If your fence is built with cedar and you like the natural weathered gray look from aged cedar, you can skip this step.
That’s it!
This was a fun project and I think it looks amazing!
Let me know what you think in the comments below.
Take care!
Hi, you have created a great looking fence and provided heaps of detail. Would you be able to supply details on how a matching horizontal slat gate to match would be achieved. I realize some bracing would be required.